Styrophone Crystal Loud Speaker!
Peebles Originals-Projects & Instructions. Build your own!
(Intermediate Builders)
Project by Bill Conn


This project was researched and designed by "PeebCon" (Peebles originals & Friends), and we have spent much time experimenting with, and building this speaker system. Many trials and errors were experienced before we had the perfect system. If you follow these building instructions, "exactly" as we have outlined here, you to can have an outstanding crystal radio loud speaker. I guarantee you will be very surprised as to how well it operates.
Keep in mind, to appreciate this speaker your crystal radio must first have very good/loud reception conditions. You must be near a powerful station or have a very substantial antenna system or both. I live about 25 miles from the nearest station. I've constructed a fairly elaborate antenna system in the tops of the trees around my home. This speaker can, and does clearly fill my whole living room and behond with sound! The cost for parts to build it will be around $40.00 or less. If you do build it, please let us know what you think of it.
Styrophone Speaker Construction
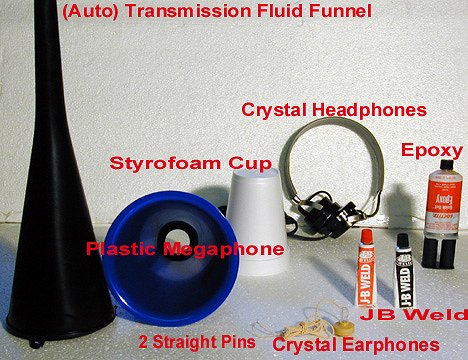
Basic items needed to build the "Styrophone" Speaker
One Automobile Transmission Fluid Filler Funnel (Measures 17 inch long X 4.75 inches wide mouth).
Two inexpensive, Plastic Megaphones (Measures 8.25 inch long X 6 inches wide mouth), you can get them here: www.imprintsonline.com/doc/megaphones.htm Tell them you would like to purchase some samplers.
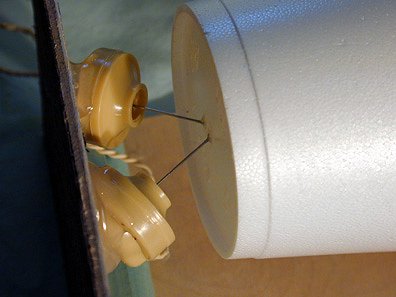
One Styrofoam cup (Measures 4.75 inch Tall X 3.50 inches wide at top/mouth).
One set of modern, Dynamic Headphones, you can get them here: www.midnightscience.com
Two Crystal Earphones, you can get them here: www.peeblesoriginals.com
Two Straight Pins, there are large size and small size pins available, use the small sized ones.
Epoxy, comes in two parts, must be mixed, or JB Weld, comes in two parts, must be mixed.
Click on the small pictures to see detailed pictures.
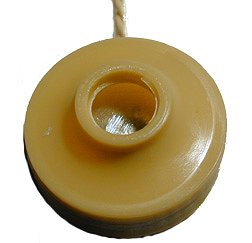
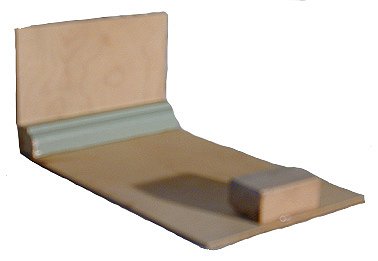
Sand Diaphragmwith 120 gritsand paper. |
Step #1
|

Place a small dabof JB Weld incenter of diaphragm. |
Step #2
|
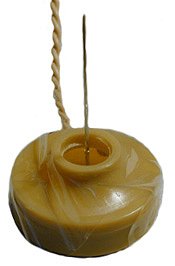
Place tape over theearphone.Insert straight pin.
|
Step #3
|

 |
Step #4 |
 |
Step #5 |
|
Step #6 |
 |
Step #7 |
 |
Step #8 This will give it a nice finished look. The Filler funnel is a bit rough from the factory. They may have alot of excess plastic molding hanging onto it. The mold seams are also a bit crude looking. I have used a fine file and sand paper to clean this all up. Then I spray painted the whole thing with some black spray paint. Same goes for the shortened megaphone. I used some quality GOLD spray paint to finish it off. It's best to finish sand the surface of the shiny/smooth plastic with 400 grit paper to assure the spray paint will bond well to the plastic. |
 |
Step #9 |
 |
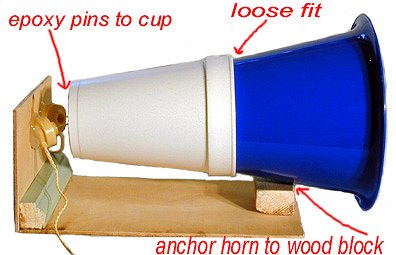
Step #10 Once you have the funnel and cap cut/drilled to fit properly then mix up your epoxy and glue the two pieces together. Be sure not to use to much glue. Do a nice clean gluing job. Remember it's very important that the tin diaphragm does not come in contact with anything when you screw the phone cap back onto headphone diaphragm portion. |
|
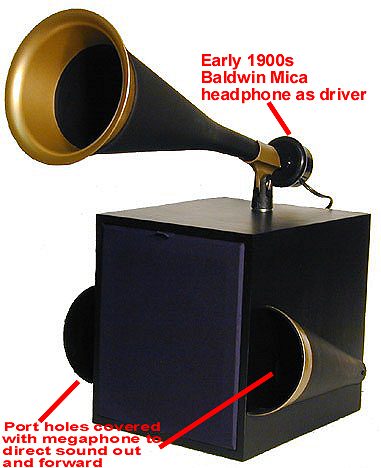
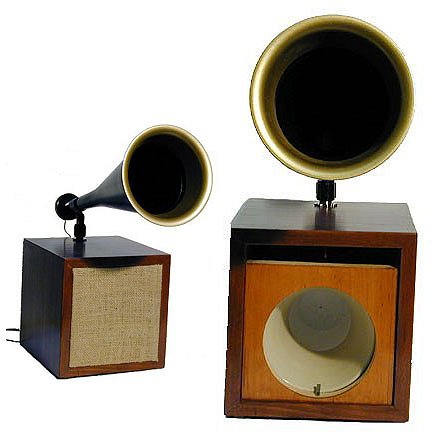
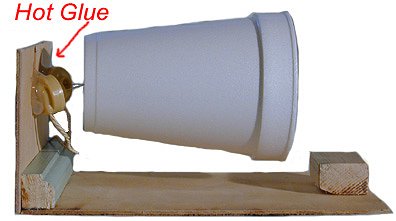
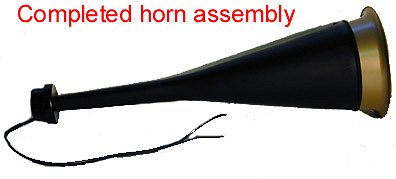
Completed Horn Speaker! As you can see the finished horn resembles a vintage RCA Victor horn speaker that you may see on an old crankup cylinder type phonograph! All you need to do now is connect all the wire leads of the 2 earphones (styrofoam cup speaker) and the headphones (Horn speaker) together. First connect the styrofoam cup speaker wires together. Each earphone has one positive wire lead and one negative lead. 4 wires total. It's nearly impossible to tell what leads are + and what ones are the - leads coming from the earphones. So connect the four leads together to make 2 leads total. Hook up the styrofoam cup speaker to your crystal set. Pay attention to the speaker volume. Then unhook the leads and revers the polarity of the 4 wire connections. You will hear that one way is louder then the other. This tells you when you have both the + leads hooked together and both - leads hooked together correctly. No worries if it doesn't have alot of volume at this point. When you connect the "horn speaker" leads together with the cup speaker leads then a magical thing happens. The headphones and earphone are made with two different types of technology, when the two are wired together it creates an amplification of sorts. This is one of the reasons this system operates so well! I will leave the cabinet building up to you. Just keep in mind that a well made cabinet is a very important part. The styrofoam cup resonates sound from it's entire surface. When it's place inside a cabinet it traps all this sound and directs it out through the front of the speaker cabinet. Be sure to create a port hole in the face of your cabinet so this sound can escape. Look at the finished speaker cabinet (Click here) to see the long slender port hole I build into the top portion of the cabinet. NOTES:
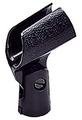 Tapered Microphone Clip
I used a stand up microphone mount clip to connect the horn speaker to
the wooden cabinet. This give it the ability to pivot from left to right
and up and down. The microphone mount clip is perfectly shaped to fit snugly
onto the tapered form of the horn.
Or one could use some PVC parts along with flexible gas tubing for the mounting. Flexible gas line tubing can be purchased at any store that sells propane or natural gas heaters. This speaker will operate with ANY type of an AM crystal radio, no power needed. I've even tested it on one of those cheep little reproduction Rocket Radios and it performed outstandingly well! We believe there has never been any type of a loud speaker for a crystal set developed before that performs the way our "STYROPHONE" Speaker performs! Try it, you will be very surprised. It's well worth all the effort! If you do build this speaker system I highly recommend you do it EXACTLY as we have outlined above. Using the same identical parts shown or you may not get the results you desire! |